
Resizing photos to fit Canva Frames is a common frustration. But it’s not that difficult to get your photo to fit just right and centered in your Canva frame without cutting off your main focus.
The methods that I’m about to share with you are great if you get frustrated when people or your objects get cutoff every time you place images in your frames. In this post we’ll take a look at a few different options and if you are more in to videos, I’ve got that too!

Keep our content free from the start, by sharing and caring with all of your heart!
This page contains affiliate links, which means I may receive commissions if you choose to purchase through links I provide (at no extra cost to you). Thank you for supporting the work I put into this site! As an Amazon Associate I earn from qualifying purchases.
How to Place a Photo in a Canva Frame
Placing a photo in a Canva frame is quite easy! All you need is your photo and a Canva frame on your workspace.
Upload your Photo
If you haven’t uploaded your photo in to Canva you can either drag and drop it in to your workspace or follow these steps:
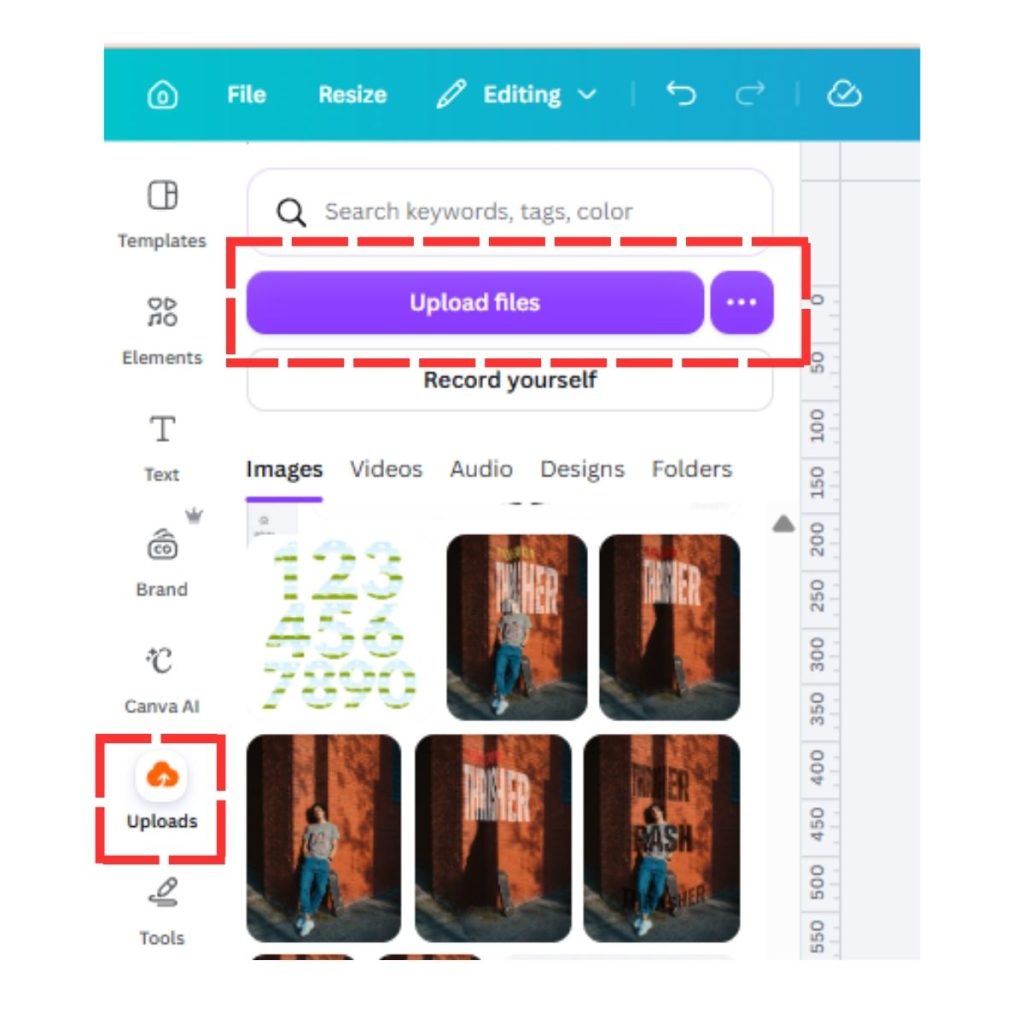
- go to UPLOADS on your left sidebar
- click the UPLOAD files button
- search for your photo
- select open on the bottom left corner of your dialogue box.
- Your photo will be uploaded in to Canva and in to your Images repository under the UPLOADS section of Canva.
To Place a Photo on your Workspace
To place a photo on your workspace, find your photo in your UPLOADS section and click it. Your photo will then appear on your workspace.
To Place a Photo in a Canva Frame
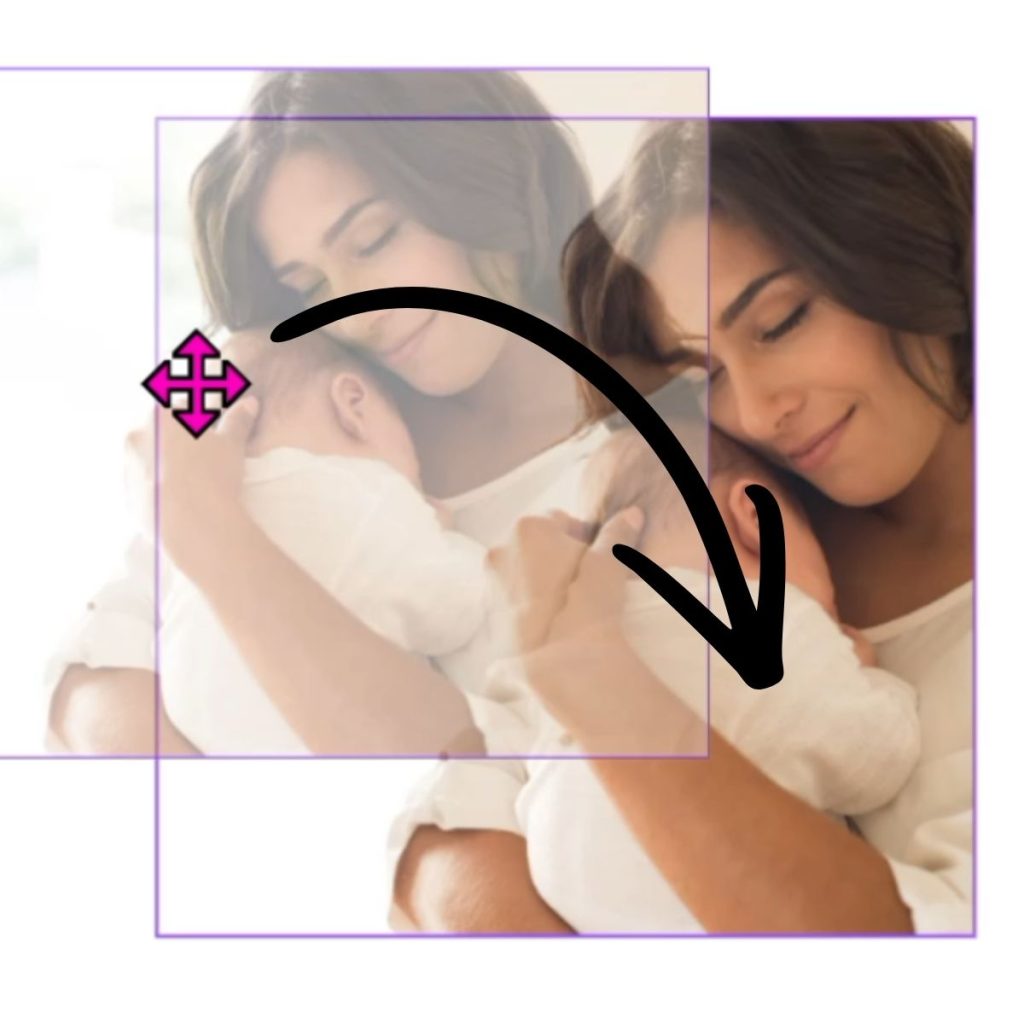
Place your photo on your workspace then select the photo with your mouse and drag and drop it in to your Canva Frame. That’s it! You’ve now learned how to place a photo in a Canva frame.
Re-position Your Photo
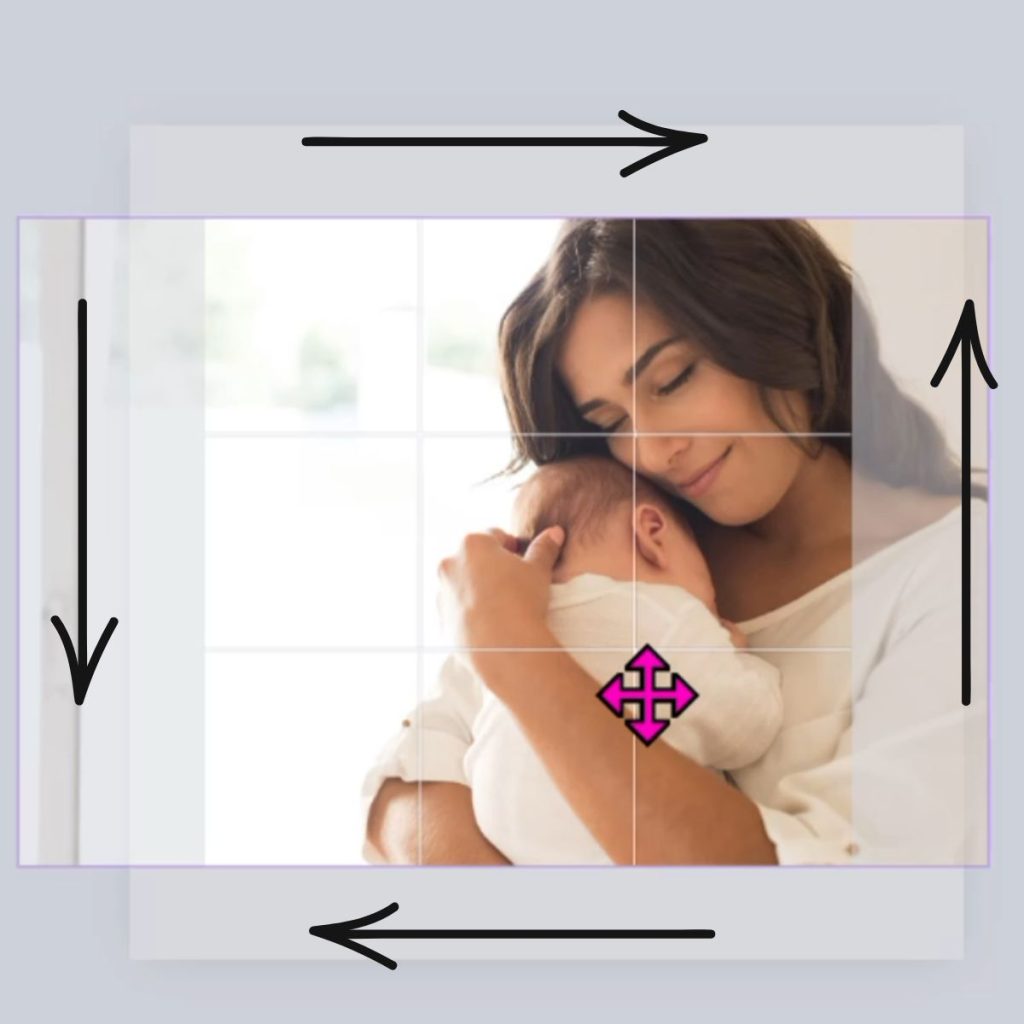
Once you’ve placed your photo in a Canva frame, it will automatically centre the photo according to the width and height of the Canva frame.
If the photo appears exactly where you want it, that’s great! But 80% of the time photos need to be re-positioned in Canva frames. This might be due to the the fact that focus of your photo is not centred in the frame.
We can easily re-position the photo by double clicking on the photo and then moving it up, down, right or left to position the objects of the photo in the middle of your Canva frame.
But sometimes, re-positioning your photo doesn’t solve your problem and that’s where the next step will help out.
This page contains affiliate links, which means I may receive commissions if you choose to purchase through links I provide (at no extra cost to you). Thank you for supporting the work I put into this site! As an Amazon Associate I earn from qualifying purchases.
Expand Your Photo
If you’ve tried everything and that still isn’t enough, maybe a person isn’t in focus, I’ve got the ultimate trick to get your photo to fit any Canva Frame!
Please note that this next feature is a Canva Pro feature and if you don’t have Canva Pro, you can try it free with my affiliate link posted in this article.
But, here’s a free way to achieve the result that may or may not help you!
Place your photo on a workspace that is the same ratio as your photo. Reduce the size of your photo slightly leaving some space around your photo. Download your photo and then re-upload it in to Canva.
Now try to place the photo in the Canva frame and position it. Did this solve your problem? If not, move on to the next step where you will need Canva Pro.
Follow these steps to Resize Your Photo to Fit any Frame
- Before you begin, take note of where the object in your photo gets cut off. Remove the photo from the Canva frame by selecting the frame, right clicking and then selecting the option to DETACH IMAGE.
- Select the photo, then click the CROP ICON from the floating menu at the top.
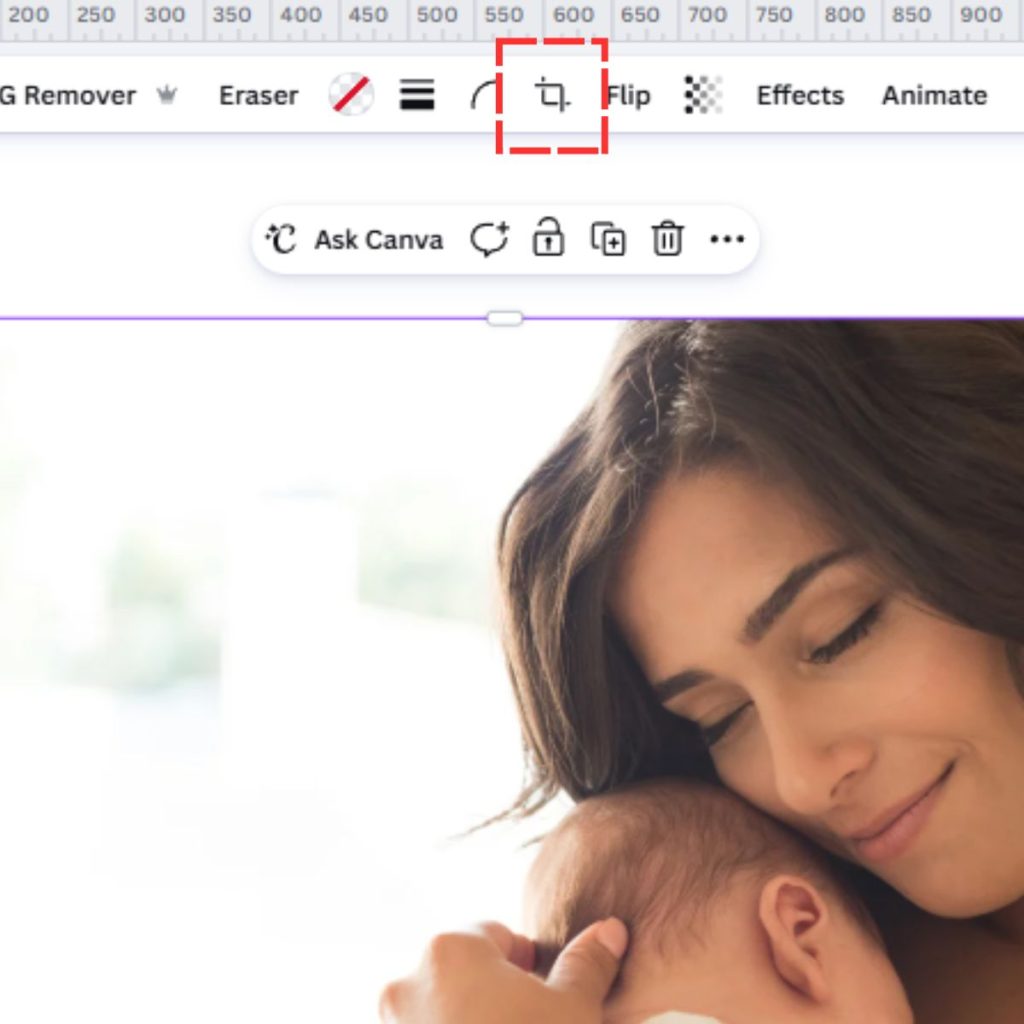
NOTE THAT THERE ARE SEVERAL WAYS TO GET TO MAGIC EXPAND.
- The left panel will open up. Look for the EXPAND TAB.
- You’ll have three options (freeform, whole page, 1:1).
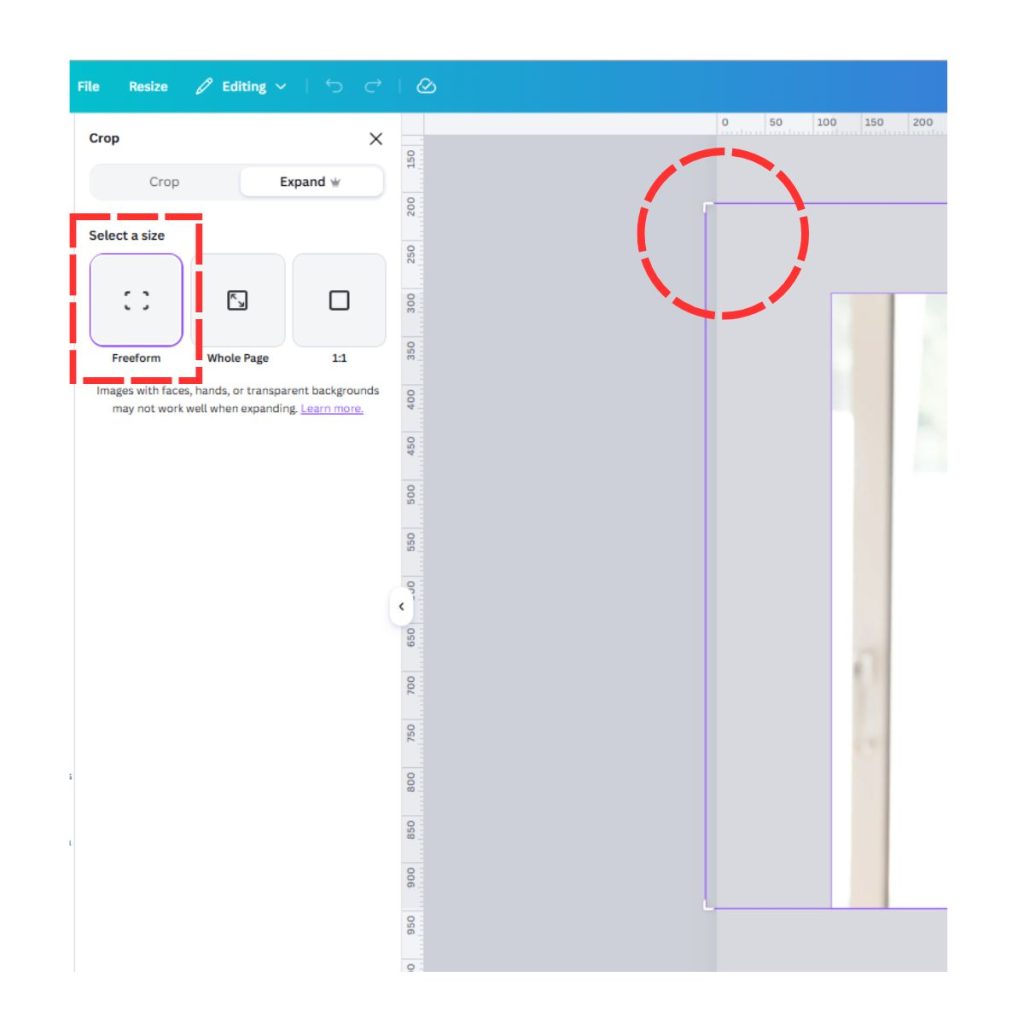
- Choose the freeform option.
- You’ll notice little white corner handles. Click them and then drag them to make your photo larger. Do this for as many sides as you need to to make your image larger.
- Once done, select the purple EXPAND button in the panel.

- You’ll get four image options. Click on each image to see a preview of what it will look like. Select the one that works for you and then click the DONE button at the bottom.
- Voila! Your image is much bigger and Canva AI has now added to your image to make it larger, while keeping the background consistent.
- All that’s left is for you to drag and drop the photo in to your frame and re-position it to your liking!
Video Tutorial
If you’re more of a visual learner, I’ve got the perfect video for you. Watch in this video how I transform an image to make it fit into a Canva frame.



Leave a Reply